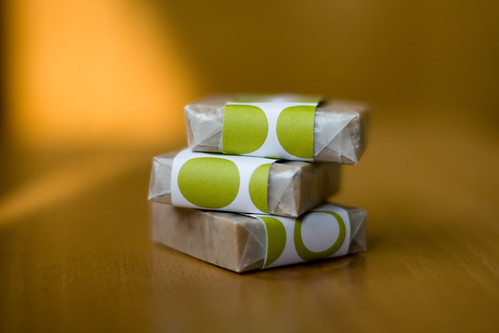
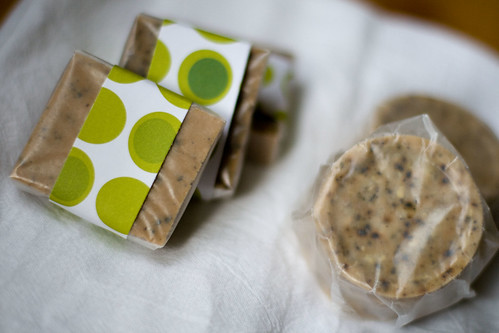
with the craft projects that is. But when do all craft projects turn out the way you had envisioned? they all can't be winners now can they? (anyone know that movie??)
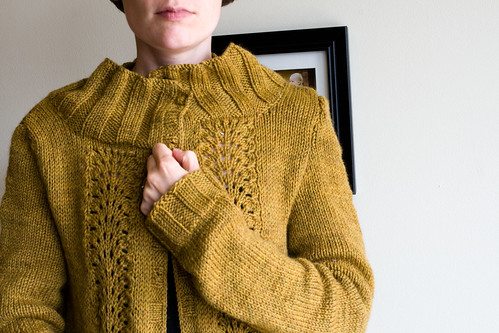
lace cardi sweater: finished! bought the buttons but the collar is strange. I feel like Queen Elizabeth. For some reason there is just too much collar and it gathers in ruffles on my neck. I have no idea what happened. I followed the pattern exactly but it sure doesn't look like the model's. I think what I will do is rip out maybe 60-75% of the collar. I think it will lay flat and be a pretty rockin' cardi still. I am still thinking before I rip though, way too warm for a wool cardi anyways, so I have some time.
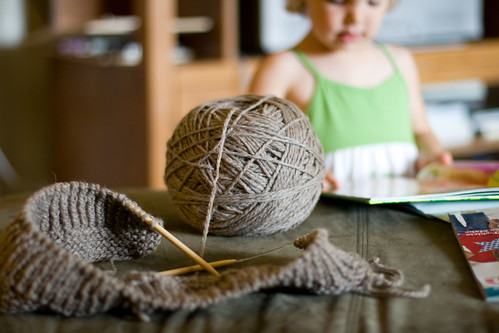
shalom sweater: I started working on this last week. But I wanted to modify the pattern so that it would close all the way down instead of just the top. BIG mistake. I forgot that I have no idea what I am doing. So the modifications did not work out. I will have to rip the whole thing out (sadly, I got a lot farther than the picture below shows, somehow I kept thinking it would all work out). I am not sure if I will try this sweater again or just find a pattern that I don't have to modify. There must be one out there!! I really like this yarn though, Cascade Eco yarn, look how big this ball is!! It is bigger than my girl's head!
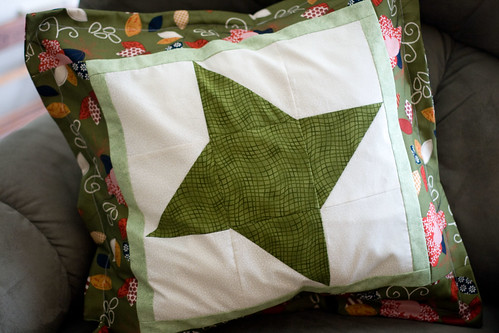
Friendship star pillow: done! and squishy
Summer blouse from Weekend Sewing: I bought special fabric for this, 1 1/2 yards just like the pattern called for, so not enough!! I went to cut out the blouse on Saturday and discovered this sad fact. So now I have this pretty fabric and no blouse. plus I am annoyed. I checked the errata for this pattern and it said nothing about the fabric yardage, so I am not sure if mine shrunk more than other fabrics...
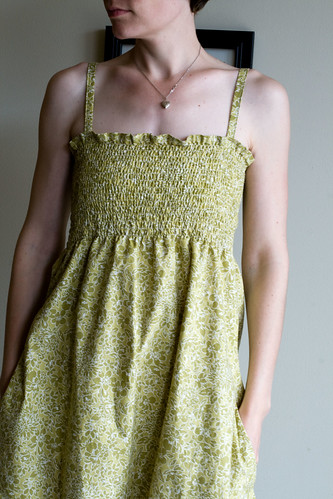
Mendocino Sundress:!! love this. I wore it yesterday. so awesome and comfy. I did have to take in the sides a bit to get the bust to fit. It is not tight by any means. I think next time I will do the elastic shirring before sewing up the last side seam like Heather Ross has for the small version of the sun dress in her book and on Martha's website. but still it is wonderful!
Tuesday, May 26
Wednesday, May 20
summer pop coin quilt
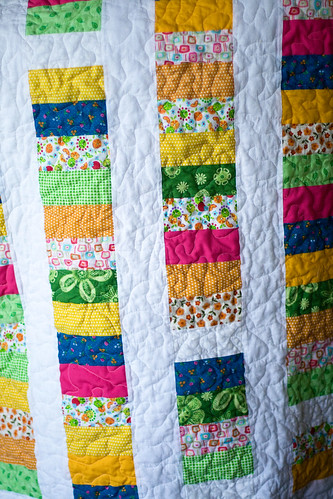
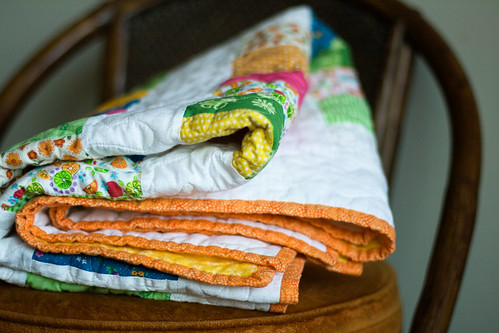
The coin quilt is finished! I tried a bigger stipple with this quilt, while it washed up very nice, I think I went a little too big. But I am sure the sweet baby that gets this quilt won't analyze the stippling!
and now I might have the quilting bug...new fabric was ordered (look how nice this fabric was packaged from fat quarter world) for pinwheel and friendship star quilts.
Monday, May 18
doing the running man
man, I have been quiet?! My sweater has taken a little time but I am happy to say that it is finished (sans buttons) and is blocking again right now! I think I LOVE it! I might wear it everyday. *running man performed here*
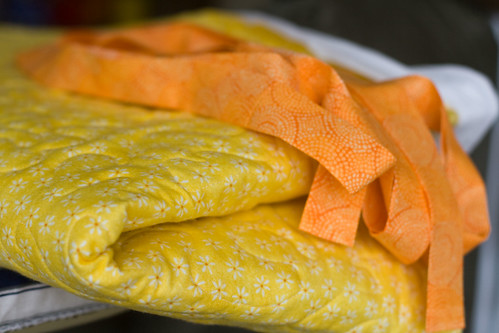
The coin quilt is stippled! The binding is half done, I just have to hand sew the other half to the backing. When my mom was here, she showed me how to do mitered corners. I would have never figured out how to fold the fabric and sew to have that nice corner. Sewing and then flipping it over to hand sew really stumped me, so I would have normally done 4 separate binding pieces. Thanks Mom!
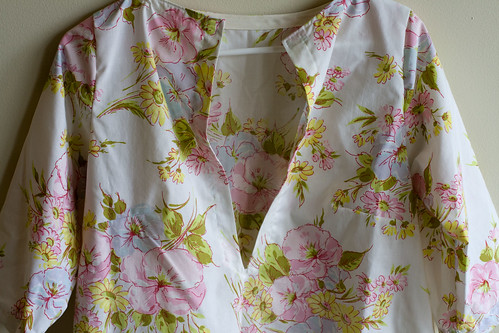
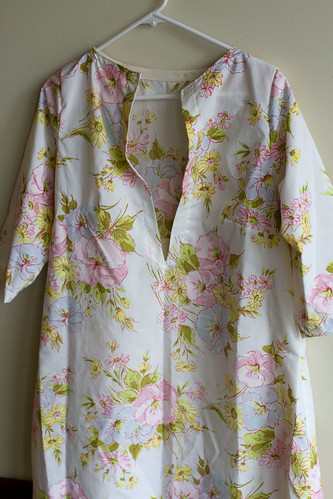
Remember, I said that I had a great sheet from goodwill that would look good as a summer blouse. umm, not so much. When I looked back at the sheet, I knew it wouldn't look good as a blouse (and my husband said I would look like a really old lady) so I added some length and shortened the sleeves to make a bathing suit cover up. It was either that or pj's but my husband laughed at that suggestion. nice. I am looking forward to making the blouse in my pretty fabric, hopefully this week!
(I should have ironed it again)
Oh one more thing, is it just me or does every recipe in the latest issue of Martha look AMAZING?! We made the blueberry scones, AMAZING! I am getting so pumped for berry season and apricot, well and peach, oooh and apple seasons too!
Tuesday, May 12
momma's day
I had myself a great little momma's day. My girl and I spent part of the morning playing and taking pictures at the Hershey Gardens. Then the husband and my girl took me to the book store where I got to pick out any craft book I wanted!!! WHOA! big decision! I took home Weekend Sewing. This book is even better than I imagined. The projects are unique, some look easy and some more challenging, the pictures are gorgeous, and I want to start sewing something NOW! The patterns are also included in the book and not the kind where you have to enlarge and piece together (I feel cheated when that happens), these are full on patterns. I did order some tracing paper as Heather Ross suggests to keep the original patterns intact though.
Now I have to decide what to make first! The yard sale skirt and the summer blouse are waaaay up there. I have some sheets that would be great fabric for both. I also treated myself to a pretty Amy Butler print for a 2nd blouse, I know I will love this blouse so two will not be too many. Plus, I can practice with my cheap goodwill sheet and then feel confident cutting into the Amy Butler fabric.
I also love this tent idea. I got some fabric from my neighbor who is moving away (so sad) that will be perfect for a tent (not sad). I think my girl will think a tent is crazy fun. you know, kids and tents.
Lastly, for momma's day I made a special meal of crab and corn chowder. ahhh heaven. This is a quick soup recipe from Rachel Ray. Did you know there is a whole website devoted to hating Rachel Ray??!! She is kinda annoying but seriously? The people who post things about her watch her shows just to rip her apart on the website. How can they spend all that time watching someone they hate? but I guess everyone has their own thing, I am sure other people think us crafters are crazy too. Anyway, my day was great! I hope you had a nice momma's day too!
PS! my lace panel cardi is in the blocking process right now! After which I add the big collar and the button band. A nice wool sweater perfect for summer! HA!
Thursday, May 7
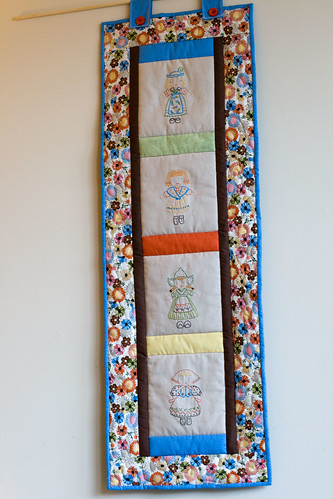
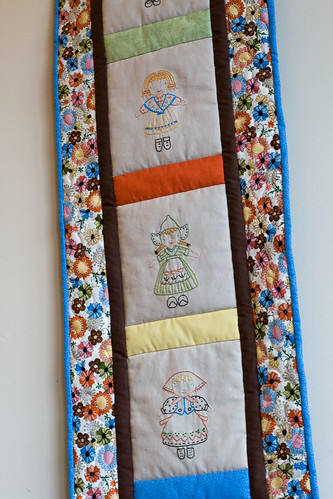
pretty little maids Wall Hanging!
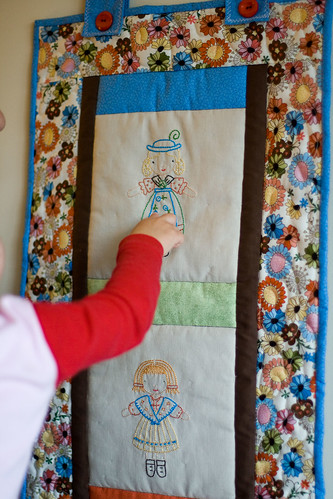
As I said before, my mom and I just didn't like the pretty little maids in a quilt. The maids would be hidden by the quilt blocks. So we came up with this wall hanging instead. We both really love it! The maids stand out and take the show, as they should. Thanks Mom!!
I haven't decided where it will hang, I am leaning towards my craft/guest room, but I just won't see it enough in there. I don't craft in there (no tv or internet?? heck no, I can't hang in there!), that room just houses all my loot.
my girl practicing her colors.
Monday, May 4
soap!
I was inspired by this post to make or rather embellish a soap base. I put this in the back of my head, thinking that these will make great little gifts, especially a nice addition at Christmas. But when I was at JoAnns the other weekend and found myself with all sell items in my cart and a 50% off one non-sale item in my hand. I went ahead and got myself the soap base. I knew I wasn't going to be able to wait until Christmas time to make the soaps let alone wait for my daughter's nap time that afternoon!
Here is what I did:
Supplies:
::Melt cubes of soap base according to package directions.
::Once soap base is completely melted, add fixings. I tried two different methods of adding the green tea: 1) added dry green tea opened from non-seeped packages and 2) adding seeped green tea opened from the seeped packages. I liked the seeped method better. This soap had more color from the bleeding of the tea leaves. I also dumped a few teaspoons of the tea water for color and smell too.
::Pour the soaps into molds. The amount will depend on how high or thick you want your soaps. Shake the mold slightly to get ride of any air bubbles (I thought of this after I was done and had small bubbles stuck in the soap).
::After pouring some of the soap into molds I made a few soaps with green tea and dry oatmeal.
::I made 3 batches of the soap which used all 5 lbs of my soap base (I was having so much fun I just couldn't stop myself!).
::I let the soaps dry overnight. Pop the soaps out by maneuvering plastic molds or using butter knife to unstick the sides. The knife didn't hurt the molds.
::The small soaps created in the plastic cups and tuperware, I packaged up size as is. But the large blocks of soap in the pyrex pans, I cup up in to small squares (like brownies).
::I used wax paper to wrap them up and cut scrapbook paper to wrap around.
Using the 5 lb block of soap base and 8 tea bags I made at least 40 little soaps! The green tea was in my cupboard and the 5 lb block of soap was $12.50 with the coupon, not bad at all!
Verdict? These soaps make my hands feel clean! So they are purposeful! They don't however have a lot of smell to them. Next time I might add some essential oils. I like the green tea leaves though, they have a very slight scrubbingness to them. Plus, without artificial smells they do have a nice naturalness to them. And they are pretty!
Go to my inspiration post to see their soap combinations!
I am going to add these to our mom's mothers day presents (more to share on those later). I hope they like them because more are coming at Christmas!
Here is what I did:
Supplies:
- shea butter soap base (5 lb block)
- green tea
- oatmeal
- molds: pyrex pans (8x8 and 9x13), plastic or paper drinking cups, and small tupperware containers
- pam non-stick spray (used in pyrex pans before adding soap)
::Melt cubes of soap base according to package directions.
::Once soap base is completely melted, add fixings. I tried two different methods of adding the green tea: 1) added dry green tea opened from non-seeped packages and 2) adding seeped green tea opened from the seeped packages. I liked the seeped method better. This soap had more color from the bleeding of the tea leaves. I also dumped a few teaspoons of the tea water for color and smell too.
::Pour the soaps into molds. The amount will depend on how high or thick you want your soaps. Shake the mold slightly to get ride of any air bubbles (I thought of this after I was done and had small bubbles stuck in the soap).
::After pouring some of the soap into molds I made a few soaps with green tea and dry oatmeal.
::I made 3 batches of the soap which used all 5 lbs of my soap base (I was having so much fun I just couldn't stop myself!).
::I let the soaps dry overnight. Pop the soaps out by maneuvering plastic molds or using butter knife to unstick the sides. The knife didn't hurt the molds.
::The small soaps created in the plastic cups and tuperware, I packaged up size as is. But the large blocks of soap in the pyrex pans, I cup up in to small squares (like brownies).
::I used wax paper to wrap them up and cut scrapbook paper to wrap around.
Using the 5 lb block of soap base and 8 tea bags I made at least 40 little soaps! The green tea was in my cupboard and the 5 lb block of soap was $12.50 with the coupon, not bad at all!
Verdict? These soaps make my hands feel clean! So they are purposeful! They don't however have a lot of smell to them. Next time I might add some essential oils. I like the green tea leaves though, they have a very slight scrubbingness to them. Plus, without artificial smells they do have a nice naturalness to them. And they are pretty!
Go to my inspiration post to see their soap combinations!
I am going to add these to our mom's mothers day presents (more to share on those later). I hope they like them because more are coming at Christmas!
Subscribe to:
Posts (Atom)