Tuesday, September 29

an orange quilt

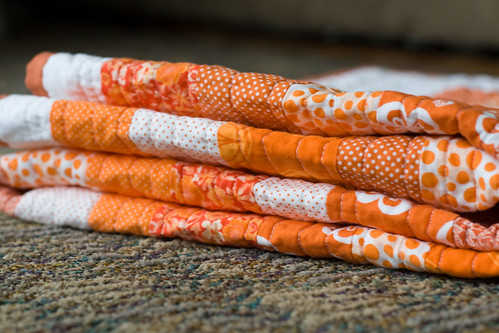
A friend of mine moved a few weeks ago. I wanted to make her a going away present to tell her how awesome she is and how much I will miss her but of course I am running behind just like all my handmade gifts. I have never met anyone who loves Halloween like my friend, Jen, so of course she loves the color orange too (me too, such a great color). Thus, an orange quilt was born.
orange quilt

I quilted it with irregularly spaced straight(ish!) horizontal lines. I really enjoyed quilting like this and just look how crinkly!
orange quilt
orange quilt

I purposely didn't buy enough of one fabric for the backing so I would have to try out something fun on the back.
orange quilt
I know not super crazy back there but it felt good to be brave.

orange quilt

Pattern: inspired by this quilt (p.s. I really want to do a rainbow one like that one). The orange stripes are either 2, 2.5 or 3 inches in width and all various lengths. After arranging them, the white was filled in.

Size: 36" x 52"

orange quilt

Monday, September 28

kid size oven mitt

Our weather lately has gotten me PUMPED for fall. Fall has the best colors of any season and I love fall foods. A few favs: winter squash, this cauliflower soup, and applesauce (I added cardamom to our applesauce batch this year, I really like cardamom and applesauce). Speaking of cooking...an oven mitt for my girl. After I showed her the finished oven mitt, she made me a hot pickle in her kitchen.

child's oven mitt

child's oven mitt

Such a simple project but the mitt above was my 3rd attempt. I am glad I got it right and that she loves it...certainly makes crafting way better when the gift is not forced upon the recipient!

Thursday, September 24

i heart...

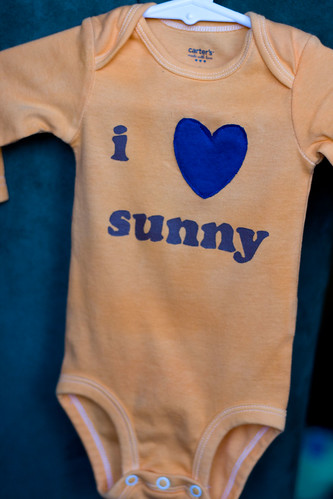
I love Dana's Made it blog. She has great projects and am completely envious of her sewing skills (she can make anything), plus she is sooo nice. I fell in love with this freezer paper stenciling project. I don't love doing freezer paper stencils but with projects like this it is hard not to like it. I think the stenciling always turns out with an unfinished look to it, but maybe I just need more practice with it.

This one is for a sweet girl who's big brother is named Roman.
i heart freezer paper stenciling


And this for two little boys who love their dog.
i heart freezer paper stenciling

I thought I did a good job getting a uniform color when dyeing the onesies but I can see now I didn't! Oh well, I really like how bright of an orange I got the second one (actually the picture isn't that great but trust me it is bright). And that blue heart gives it a little 80s something, at least I think so. So many plans are coming to mind, you can be sure to see more of these in the future.

Tuesday, September 22

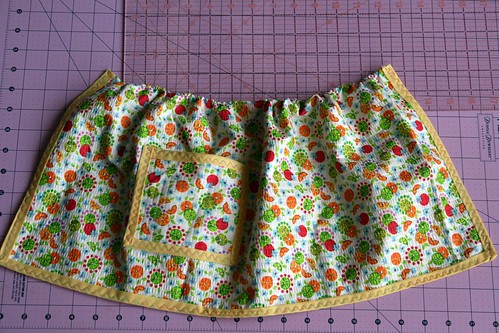
how to make a child's play apron

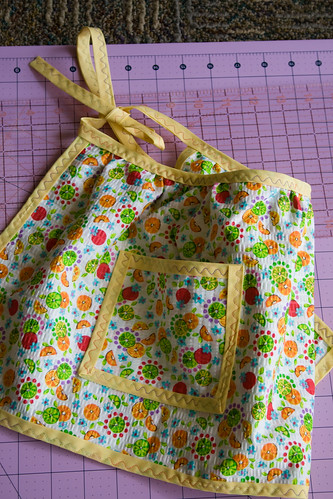
I wanted to celebrate my new tutorial with another fun tutorial. My girl got a whole tea set for her first birthday from Gregg's aunt. His aunt included aprons, placemats, and napkins. Everything was super cute and I thought clever too because she used bias tape to finish all the edges. Ever since, I have been using her technique to make simple aprons for sweet birthday girls...
child's play apron

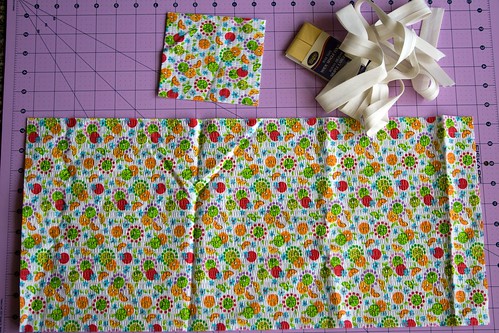
Supplies:

3 yards of bias tape (bought or made)
1/2 yard of fabric (probably could get away with 1/4 yard)
child's play apron

How to:

:: With your fabric right sides out, cut a rectangle 22" x 8". So you have two rectangles, wrong sides together. Keep them together. Cut two smaller rectangles around 4.5" x 5". Keep these two rectangles wrong sides together too.

:: First we will start with the pocket. For the top of the pocket we need to attach bias tape to cover the raw edges. Place the fabric pocket inside the bias tape and cut the length of tape you will need. I don't leave much overhang. Sew a straight or decorative stitch to attach bias tape.
child's play apron

:: Decide where you want your pocket to go on the apron. I usually pick a slightly off center spot. I also like to vary the fabric pattern from the apron (e.g. vertical to horizontal).
child's play apron
child's play apron

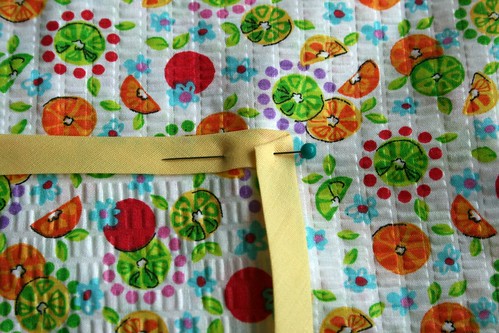
:: Then we will attach the bias tape around the pocket, starting at the top edge, while pinning both the pocket and tape onto the spot we picked on the apron. Sometimes it is easier to pin the bias tape around the pocket and then pin it to the apron. When you get to a corner, fold the bias tape over so it has a nice mitered corner.
child's play apron
child's play apron
child's play apron
child's play apron
child's play apron
(upside down pocket)

:: I haven't figured out a good way to hide the raw edges of the bias tape yet. If I try to fold it under, the top of the pocket looks wonky to me. So I just cut the bias tape flush. Now sew your pocket onto to the apron.
child's play apron

:: For the top of the apron, we are going to sew a long loose stitch so that we can gather it up. I set my machine stitch length as long as it can go and leave yourself long bobbin tails with which to pull and make the gathers. Sew 1/4" from edge. Now pull your bobbin tails on either side slowly so as not to break them until the top of your apron is about 14 inches.
child's play apron

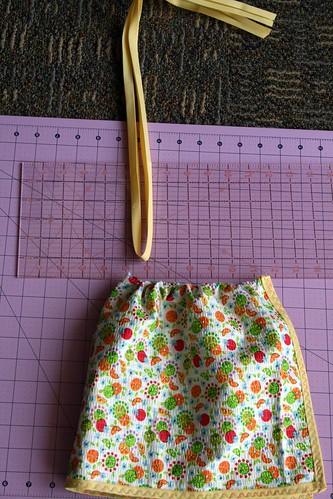
:: Now we are going to sew the bias tape to finish the sides and bottom of the apron. Again using mitered corners. Cut the bias tape flush with the top of the apron.
child's play apron
child's play apron

:: Almost there! We need to sew a long length of bias tape onto the top of the apron to finish the edge, hide the gather stitches, and to act as the apron ties. I use the rest of the 3 yd package of bias tape. To make sure that the ties will be of equal length, fold the apron in half and the bias tape. Start pinning the middle of the bias tape to the middle of the apron and go out to each side. Sometimes sewing this can turn out ugly, so you can use a wider bias tape or really try to stuff the apron top to the top of the bias fold.
child's play apron
child's play apron
child's play apron

:: Once pinned, take it to the sewing machine. Start at one end of the bias tape (again I just leave raw edges here) and sew your way to the apron and then to the other end of the bias tape. Finished!
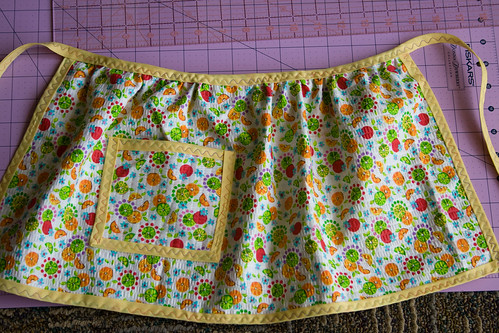
child's play apron

child's play apron

let me know if you have any questions!

Monday, September 21

New Tutorial! Picture Window Quilted Fabric Ball Ornament

Picture Window Ornament Tutorial

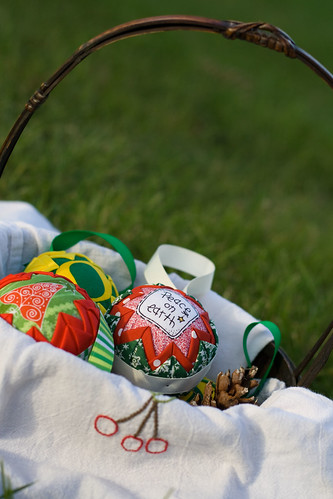
I know you know that I don't believe it is ever too early to think about Christmas and what a better way to start prepping than with these ornaments!

Picture Window Ornament Tutorial

I have had several requests from customers for this new tutorial. The "picture window" (Gregg came up with that name and coincidentally is quite proud of himself) ornament is a fun way to show off pretty fabrics or your favorite sports team. In making the other ornaments, I always select small print fabrics as the big prints just don't show well. But with the picture window those big prints can shine!

Picture Window Ornament Tutorial

This tutorial contains 40 pages with 81 detailed pictures and written instructions for the PICTURE WINDOW Quilted Ornament tutorial. There is no actual quilting or sewing in the making of this ornament.

Picture Window Ornament Tutorial

This is an Adobe PDF file (4.24 MB) that will be emailed directly to you. Please include your email address with purchase. There are no shipping charges as this tutorial contains the pattern and instructions and does not come with any supplies.

I have been working on this tutorial for a little while and I am happy to be able to offer it for sale in my Etsy shop, my Ebay, or you can click below to be taken directly to PayPal.


I also have a new listing in my Etsy shop that has all 3 of my ornament tutorials grouped together for a discount. Plus, it is fun to mix and match the different patterns for some unique ornaments. Also see the traditional and cathedral window ornaments.

Let me know if you have any questions!
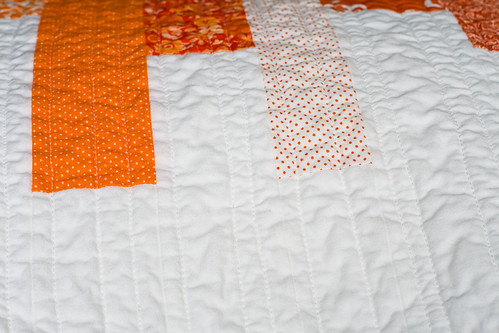
Picture Window Ornament Tutorial

Wednesday, September 16

big wonky blocks quilt

big wonky blocks quilt

These blocks were 12" square. That made for some big pieces of fabric. Which made it go together fast but not sure about the "interestingness" of it. I do love that small sashing throughout. Really sets the blocks.

big wonky blocks quilt

I used minky fabric for the backing. I have decided I don't like using minky fabric because I think it limits the quilting choices. But because this and the zig zag quilt are off to some sweet twin boys (I hope their personalities are as different from each other as these quilts are!), there is no way one boy could have the super soft minky quilt and the other have something not so soft. I quilted diagonal lines 3" apart.

big wonky blocks quilt

big wonky blocks quilt

Pattern: wonky block or off set square block

Size: 36" x 48" after washing

I started making my first quilt my sophomore year of college. I have no idea what possessed me to go make a quilt. My mom wasn't a quilter yet and I think I was a sporadic sewer at the time. But I clearly remember wanting to make a quilt and I went to the local quilt shop to get help and supplies. After I pieced that top together, in one day, it took me 6 years to hand quilt it! The quilt shop told me there are two ways to quilt, hand and machine but they said you need a sewing machine attachment for that. So of course I decided to hand quilt, I look back on this now and realize I just had no idea! I found out that hand quilting was hard and that is why I worked on and off the quilt for 6 years. I vowed to never make another quilt, it just wasn't that fun. But look at me now! I am addicted and it is fun!

Monday, September 14

Gregg's Stripey Stocking

stripey stocking

stripey stocking

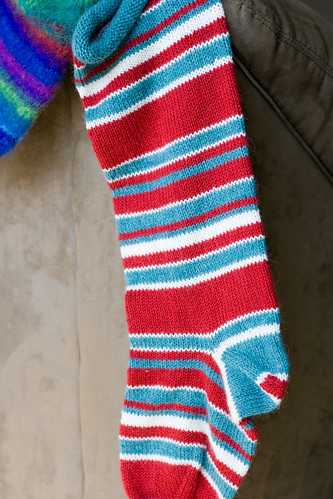
Done!! and Gregg loves it. Pattern from Holiday Knits, using berroco ultra alpaca light in cardinal, turquoise mix, and winter white. A few months ago, when we poured over stocking patterns, each picking our own pattern, Gregg immediately selected the stripey stocking. I then said okay pick 3 colors. He said well I like those colors (referring to the pattern picture), I said yes but you could have any 3 colors you wanted. He said I pick those 3 colors. Okay Mr. Imagination! But really those 3 colors look good together.


After seeing how big Lilly's stocking was compared to Gregg's I finally got the nerve to felt it up. I am soooo glad I did...

felted suprise stocking

stripey stocking

only one more to go, with plenty of time to spare...

Thursday, September 10

a belt loop

Can you believe it is Thursday?? I was pumped last night when I realized a new episode of Top Chef was going to be on (do you watch that show? I love it!). I am working on two bigger projects, one of which I stayed up way too late last night working on (almost there!) and the other will take some more time before I can share...until then a quick fix project.

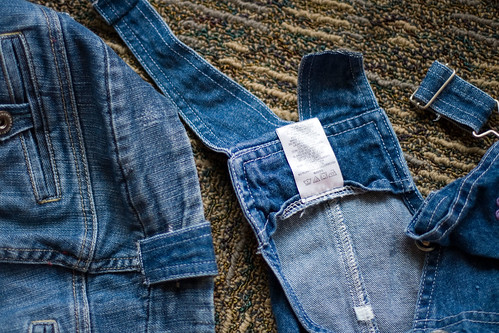
So, I had a problem, a cute pair of jeans that didn't have a belt loop in the back making the jeans fall down and the belt slide up. This was not comfortable. A belt loop was needed back there.

September 262

I used my girl's too small, and honestly not very cute to want to save them for another child, overall's. Just a length of the strap. The strap was perfect for the belt loop as it already had two nicely finished sides. I used a zig zag stitch to attach the raw ends to my jeans (just too many layers to fold them in). I didn't have a jeans needle just a universal needle, so the zig zag stitch did not work if there were too many layers (at least I think this is why). Therefore, one portion I used a straight stitch and applied fray check. I am wondering how this will wash up though.
September 263
September 264


As a side note, I think I am going to go and stock myself up on different kinds of needles so I have the right one for the job. I am trying to be better about taking care of my supplies because I think I give my mom hard attacks sometimes when it comes to maintaining my sewing tools. For example, I always call my mom with sewing questions like when my sewing tension is off and I can't seem to fix it myself. Her first question, "how old is your sewing needle? did you put a new one on?"
Me: "Ummm, no I don't think I have ever changed it."
Mom: "JENNIFER!!!!!"

Guess what I got for Christmas last year? 3 packs of universal needles!
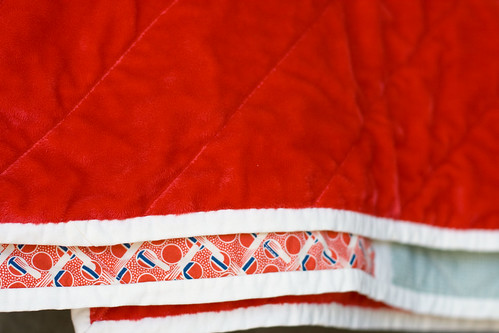

This happened last week: Me: "Mom, how often do you change your rotary cutter blade? I have been noticing that mine isn't cutting as well as it used to."
Mom: "When was the last time you changed it?"
Me: "ummmm, I don't think I have ever changed it." (I have had it for 11 years)
Mom: "JENNIFER!!!!!"

Don't worry, Mom, I am not waiting for Christmas this year for a new blade, I just ordered one.

Wednesday, September 2

messenger bag

messenger bag

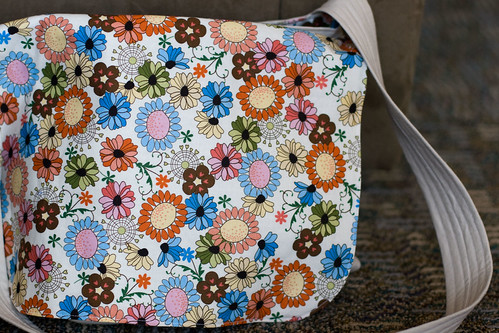
I was getting so tired of my big cable purse. I hate when you have a shoulder bag and you lean down to pick up something the bag comes around and hits you. Or having a big purse that is filled with crap, you can't find anything. So I needed to make myself a new purse. I really like all the messenger bags that Larissa of mmmCrafts has been making. She posted a great tutorial that I followed to make mine.

messenger bag
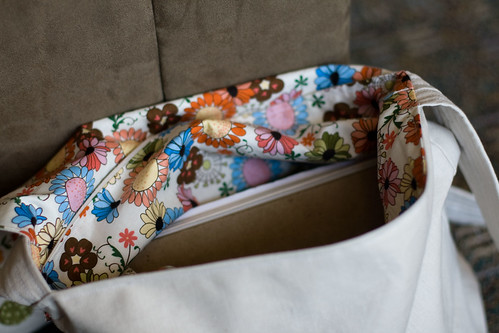
inside flap

I used a linen/cotton blend for the outside fabric so to make it sturdier I ironed on a heavy weight interfacing. For the strap I ironed on two layers of the interfacing and sewed 5 top stitches down the length to of the strap. I like the quilted look it gave it. The pocket on the back of the outside of the bag is perfect for holding my keys and phone, no searching for those darn things.

messenger bag

I thoroughly enjoyed making the flap too. I got to use some precious scraps from my favorite fabrics. I opted for a rough straight stitch to secure the flowers on the flap, I didn't think I wanted a thick zig zag around each flower (hmmm, maybe I do now). Hopefully they will stay okay and edges won't fray. I did have a tough time deciding how each flower would look, if they should have a center or not. I spent a good amount of time thinking about it and finally I asked Gregg. He said no center and it only took him a 2 second look to decide. I think I would have liked it either way.

This bag has already been in use and it is perfect so far!
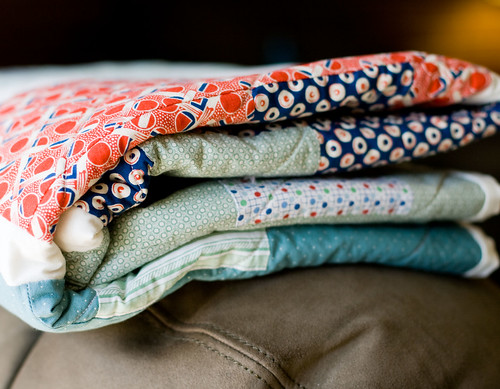
messenger bag

I am giving away a copy of my beaded sock tutorial at Chocolate Fingerprints. Go over there for your chance to win! Thanks Andrea for hosting!