We are in the midst of apricot season here. We got a half peck two weeks ago and I had every intention of making jam with them but instead we ate them all...we just couldn't help ourselves. So this weekend we got another half peck and I made sure to get the jam started right away. I made two types of apricot jam last year. One with lemon jello and one with a pectin box. While both were good, the jam made with pectin was incredibly sweet. But the lemon jello one had this wonderful tang to it. I got the recipe from my neighbor who got it from her church. Seriously try it...
Apricot Jam
8 cups blended up apricots
5 cups sugar
6 oz lemon jello
Clean apricots but leave skin on. Cut apricots in halve, remove pits. Blend apricots in blender until you reach your desired consistency, chunky or smooth. Place all ingredients in large pot, stir and heat to a boil. Once jam reaches a boil that cannot be stirred down, boil for 26 minutes. Stir constantly or the bottom will burn! (I did that last year). Skim off any foam that develops. Place jam in hot canning jars and seal in water bath or steamer for 20 minutes. (I am no expert canner so please read up on canning before you begin this part). I got 4 pints with a bit left for a couple sandwiches and enjoyment right after the kitchen was clean.
I have only canned a few times, all starting last summer. I seriously love the popping sound as the jar seals, I get all giddy that I must have done something right!
Wednesday, July 29
Monday, July 27
catching up
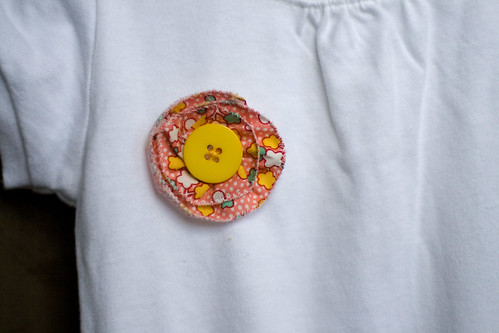
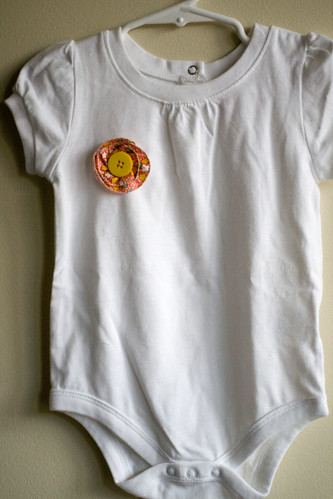
From the moment I saw House on Hill Road's how to on this ranunculus, I couldn't stop thinking about it. I love those projects that not only you want to make right NOW, as soon as you start, you are done, so you have your little obsession right NOW!
I see many more of these on cute little girls that I know shortly. In fact, this flower might even be easier than applique.
Oh I have to show you my new gift tags! I wanted to have a small, mostly, blank gift tag where I could write down the care instructions for handmade gifts. Some things I don't think need them but beaded socks sure do (they have their own special tag) and definitely yarny projects. I order my business cards and the beaded socks care instructions (as a blank business card) through 123print.com. They have a ton of selection and the prices seem reasonable to me. So I got a simple flower business card and added a few lines but still left plenty of room for the care instructions.
This past week I didn't have any crafting time for me because I had another HUGE sock order for 42 pairs! I finished up yesterday!
ps. Happy 35th anniversary to my lovey dovey parents!
Wednesday, July 22
zig zag quilt
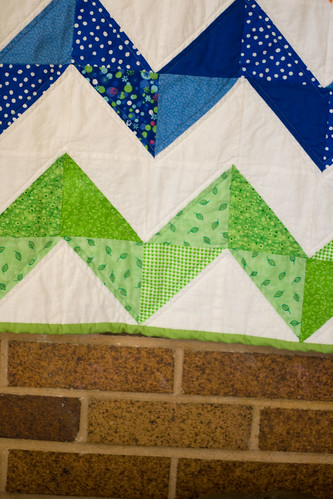
oh my, do I love this quilt!
I followed the purl bee's tutorial with minor exceptions: I wanted to use three bright colors, so I didn't do the solid row of white. I also cut 5" squares and added a 9th square to each row. I had planned on stippling this quilt but then I decided to use super soft minky fabric for the backing and just wasn't sure if stippling would ruin the softness of the fabric (does anyone have any experience with this?). After consulting with my mom, we decided that 1/4" quilt lines on either side of the zig zag seams would be best. I put in a green bobbin to match the minky fabric and white up top. One baby boy blanket finished! Gregg said this one is his favorite, I think that minky fabric won him over, he is man who appreciates the comfy in life.
Pattern: purl bee zig zag quilt
Size: 35" x 48"
I still have a set of fabrics waiting to be turned into a boy blanket but I just need one or two more and I haven't found what I am looking for yet. I think I need to make a trip to my local quilt store and that my friends will require waiting for August's craft budget to kick in. ho hum.
Friday, July 17
craft hope
I had a little kick with newborn hats awhile back. I made a few and then I was troubled about where to send them. I was going to send them to my hospital but then I couldn't help but think that the babies being born here would have hats. Surely, their parents would bring a hat for them or a grandma or heck even the hospital gives out store bought hats. I wanted my hats to go to a baby that wouldn't have a hat without someone donating one for them. So I stopped making them and they all sat in my closet...of no use to any sweet baby. Then Craft Hope posted project #3. Blankets and hats going to an orphanage in India!
warm those heads well little hats!
They need all kinds of things donated, handmade and store bought, just leave Jade a comment on that post and she will email you her address. But hurry the deadline is NEXT WEEK!!
warm those heads well little hats!
They need all kinds of things donated, handmade and store bought, just leave Jade a comment on that post and she will email you her address. But hurry the deadline is NEXT WEEK!!
Tuesday, July 14
friendship star quilt
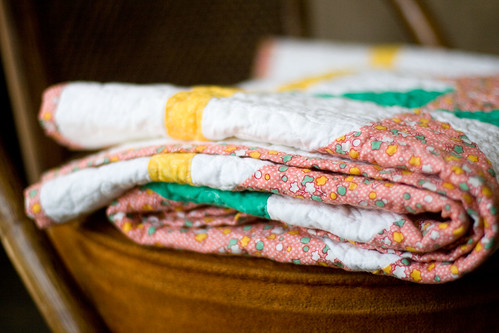
I think I mentioned before that I have a few friends with babies baking away and some are not finding out the sex...making crafting for them hard. I guess it is just hard for me to do a neutral craft. I had a plan for a girl quilt and a boy quilt. I have been struggling with the fabric choices for the boy quilt so no work on that one yet. But I got the baby girl friendship star quilt done!
My blocks are not perfect. Edges are not lined up perfect. I need practice on cutting straighter and sewing straighter. I always think I nailed that cut or that seam but nope a little imperfection shows up anyway. that is okay.
I also worked on some of the blocks then took a break from the project. I came back and finished the blocks then realized I had two different star orientations! I thought no way am I ripping those seams out (so lazy), luckily I had a good plan that I thought would make use of the different orientations. Now that I see it all put together, I think I should have ripped out the middle star, and made it match the 4 corners but I still like it.
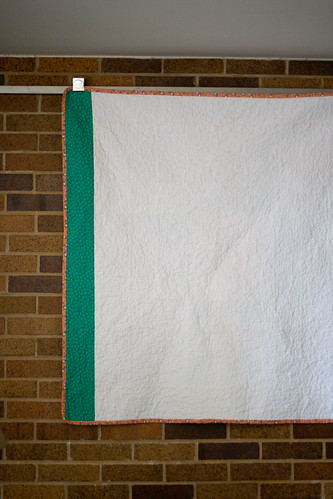
For the back, I really like just using one piece of fabric because I am just not that skilled at making a pieced back appear straight (making the quilt sandwich is hard enough to also have to worry about what the heck the back pattern looks like). Unfortunately, I needed just a few more inches to make a back, so I did do one piece of green. I really like that addition. Yea, for being forced out of the comfort zone!
Measures: 46 inches square before washing (I should remeasure it now after washing)
Fabric: The pink fabric is from the Posies from the 30's by Bev Proulx for Henry Glass fabric line. Green, yellow, and white are all from joann's.
Pattern: friendship star block
Monday, July 13
room projects and new to me blogs = inspiring!
Thank you for your congrats and crafty suggestions! I am so pumped to get started. My mom is also chomping at the bit to know b or g so she can start working on V2's quilt.
I finally got poster frames for the posters I made last fall (posters download on the sidebar if you want), so room redo was on my mind. I know I said I wasn't going to start any new projects until I got all my other projects finished. But these raggy letters are such a good idea, I had all the supplies, and it was so nice to do a quick project.
I had some foam letters spelling out "Lilly's Pad" above her bed. They were a little tired. I like these raggy letters much better. For size, I cut letter templates out of a full sheet of 8.5 x 11 inch paper. Lilly picked out all the fabric for them and helped me hang them up. I wanted to hang the letters with clothes pins across a piece of string on the wall but they were a little floppy. I think it would be fun to add these letters to a tummy time mat too.
I found some new inspiring blogs, maybe you know these, maybe not but I thought I would share:
Made: lots of sewing especially clothes
My So-Called Kitchen: cooking! and she has a refreshing take on some vegetarian dishes but seriously this beer battered fish is good!
Gourmet Mom on-the-go: my neighbors actually go to church (used to, she just moved) with this cooker/blogger, she has really fun ideas for cooking with kids, dinosaur claws! how fun, dang my daughters peanut butter allergy
Cookus Interuptus: cooking whole foods, each recipe has a pretty entertaining video. So far we have tried, Grace's Mole Con Pollo, mexican brown rice, chicken teriyaki and vegetables all good
what new to you blogs are you enjoying?
Thursday, July 9
want to make list: a big bad BABY version
That is right, this list is for MY baby!! Version 2 or V2 is what we are affectionately calling the baby in my belly until we know the sex. We are impatient people who obviously can't stand the wait. Plus, knowing V2's sex sure makes crafting a lot easier. I am not a big blue or pink kinda mom but certain colors do work better for girls or boys. Here is a preliminary list of stuff I want to craft. I know I will add tons more once we know b or g, especially clothing projects. Which is why I started Christmas crafting now, so I could use the winter for baby crafting! V2 should be arriving early February. Right around my girl's 3rd birthday and my 31st! What a birthday celebration we will have every single year!
Any other suggestions??
Crochet
baby shoes
hat
Knitting
kicking bag (rav link)
Sewing
crib sheet
nursing pads
moby wrap
sling
nursing covers
recycled wool soakers (this link has several good links, including turning a prefold into fitted! although I think the prefold works perfect as is)
newborn fitted diaper (not sure I can pull this off but I am very curious to try)
kimono shoes (TONS of other things on this link too)
baby legs
recover infant car seat
Maternity
belly band
knit waist band skirt
Monday, July 6
Lilly's stocking
Just in time for Christmas!! Well I still need to make the i-cord that will be threaded through the top of the stocking and serve as the holder. I am also deciding on whether to felt this stocking, I am not sure how small the stocking will get. So I want to make the other stockings to compare, ya know she can't have the smallest stocking!
Pattern: Christmas Rainbow Surprise stocking from Christmas Stockings: 18 holiday treasures to knit
Yarn: 3 skeins noro kureyon 253
Subscribe to:
Posts (Atom)